How to Use Custom .NET Libraries in Azure Synapse Notebooks
Joel Cochran
Data, Azure, Synapse
February 1, 2022
How to Use Custom .NET Libraries in Azure Synapse Notebooks
Azure Synapse Notebooks natively supports 4 different languages. You can write code in Scala, PySpark/Python, SQL, and C#. What I find truly compelling is that you can mix and match these languages within a single Notebook, which means you can use the best language for the task at hand. Spark pools come with a wide assortment of preloaded packages, but sometimes what you need just isn’t present. For PySpark, you can import external libraries into your Spark pool via PyPi. For Scala, you can upload JAR files and reference them in your Notebook configuration.
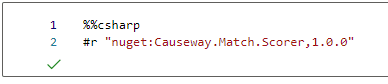
In C#, you can import packages at run time from NuGet using the #r magic command:
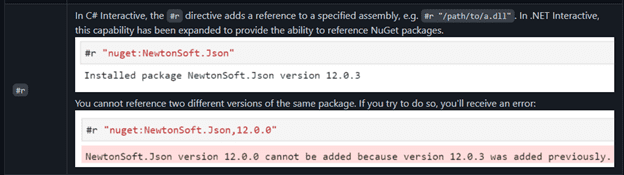
Altogether, that’s a lot of additional resources you can bring to bear to help you solve your analytics problems. That’s all well and good, but what if you want to bring your own .NET code to bring to the table? Let’s call this process Bring Your Own Code (BYOC).
As a longstanding C# developer, it’s often easier for me to solve complex problems in my native language. I already have custom DLLs I want to leverage in my Notebooks, but I don’t want to publish them to NuGet. The great news is there is a way to include them in my Notebook session at run time. At present, this feature doesn’t have direct support from Microsoft or the tooling, but by the end of this article, you’ll see it is very doable. So, let’s get to it!
Create a NuGet Package
The first thing we’ll do is create a NuGet Package for our project, but we won’t publish it to the NuGet service. Assuming you already have a C# Library project, we can easily accomplish this in Visual Studio or by using the dotnet CLI.
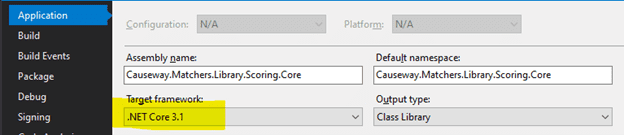
In the Solution Explorer, right-click on the Project and select “Properties”. At present, only .NET Core 3.1 is supported, so on the Application tab set the Target Framework in your project accordingly:
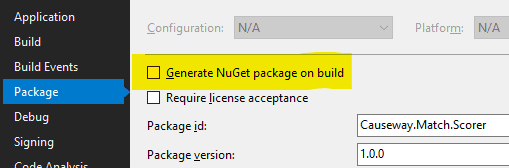
You can optionally set the Package configuration to create automatically whenever the project builds:
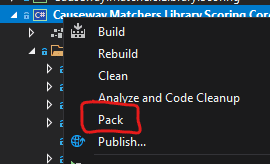
To generate the package manually, ensure that the Solution Configuration option is set to “Release” and right-click the Project in Solution Explorer and select “Pack”:
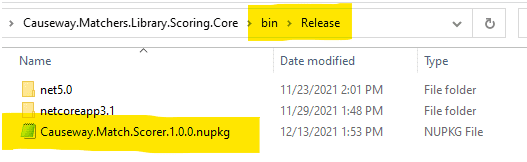
Once this is complete, you will find the package in the solution folder under bin/Release:
Loading the Package in a Notebook
Now that we have a NuGet package file, we need to deploy it to our session.
Step 1: Upload the File to Storage
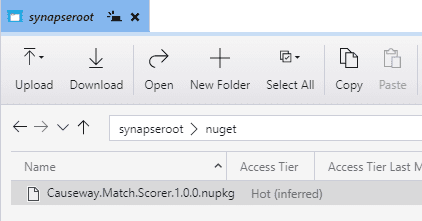
The first step is to place the file in a storage location. The simplest solution is to upload the file to the Workspace’s default account and root container (defined as part of Workspace creation). In this example, I have uploaded the file to a folder named nuget:
The root container is automatically available to the session runtime, so we’ll easily be able to access the package file from our Notebook.
If you don’t have access to this container or don’t wish to use it, Microsoft recently released the ability to Mount a Storage Location. I have not tested this, but it should work the same way in the following step.
If neither of those approaches is viable, you should be able to get the next step to work with wget or curl and a SAS token.
Step 2: Copy the File to Your Spark Session
With the package file in a usable location, we need to copy it to the session’s local file system. The underlying location path changes every time you create a new session. Fortunately, the /tmp folder is always accessible to the session, so we can forego any efforts to determine the physical path.
Synapse notebook C# cells include a handful of .NET Kernel magic commands, including #!pwsh to invoke Powershell. We’ll leverage this option to access bash in order to execute hdfs dfs:

This action copies the package file from the nuget folder in storage to the tmp folder on the session’s local file system. When it runs successfully, you will receive a message like the following:
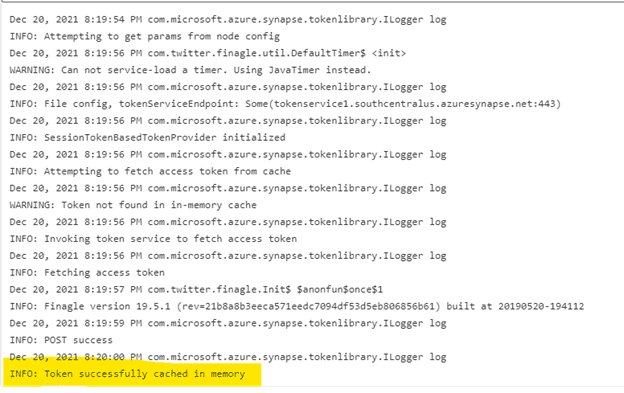
I’ve highlighted the key message informing us the file was successfully copied to memory.
Step 3: Update the Package Reference Location
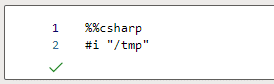
Now that we have the package file in a known directory on the local file system, we need to add that location as a NuGet source. In addition to the .NET Kernel magic commands referenced previously, Synapse also supports a handful of C# Kernel magic commands. The #i magic command is used to add a NuGet source to the session, and subsequent package installs will include that source when resolving commands. Let’s issue the #i command to include /tmp:
When it runs successfully, you will receive a message like the following:

From this we can see /tmp has been successfully added as a package restore source.
Step 4: Install the Package
The final step is to install the package. The C# Kernel magic command #r is used to install NuGet packages. Since we added /tmp as a restore source, we can refer to the package by name and version (defined in the Visual Studio project’s package properties) like so:
When the package is successfully installed, you will receive a message like the following:

And with that, the package is loaded into the session runtime – we have achieved BYOC! We are ready to write some code, so we’ll do that next.
Using Your Library
Synapse employs .NET for Apache Spark inside Notebooks. This initiative has produced an intriguing and valuable juxtaposition of the two technologies, making C# a first-class citizen of the Synapse Notebook experience. You can work with Sessions, DataFrames, and Columns, and execute Spark SQL queries.
NOTE: The following techniques work regardless of whether you are using pre-included .NET libraries, installing from NuGet, or your own custom libraries.
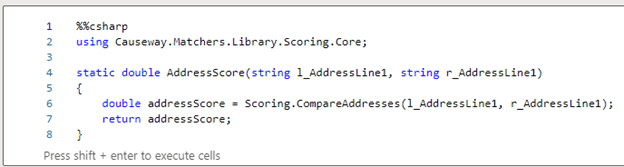
Step 1: Write a Static Method
We’ll start by adding a Using reference to the library and writing a static method that performs the task:
Step 2: Create a UDF
To execute the method, we’ll need a UDF. The following code defines a UDF that takes two string parameters and returns a double:

You’ll notice that the type is actually a Func delegate that represents a type of Udf. This translation between the DataFrame Columns and the underlying data types permits the method to send and receive native C# types.
NOTE: Udf currently has a limitation of 10 input parameters (Func supports up to 16).
You may combine Steps 1 & 2 by having the Udf execute the code rather than redirecting it to a method. That’s probably fine for simple operations, but for more complex scenarios I find that separating these concerns makes it more readable and easier to maintain.
Step 3: Call the UDF
With all the parts properly defined, we’re ready to put our UDF into action. UDFs are called as part of a DataFrame Select function call:

When this Select executes, the get_address_score UDF will execute once per row and add a Column to the DataFrame named “AddressScore” containing the results of the UDF.
Conclusion
Azure Synapse provides an immensely powerful platform for data storage, exploration, manipulation, and analytics. As a C# developer, the ability to bring my core skillset to the table is very empowering. And not only can I take advantage of a huge repository of code via NuGet, I can also bring my own solutions to the table as well. With Synapse and Notebooks, the possibilities are limitless!
To learn more, visit Causeway Solutions to get started!